将.NET Core 微服务和 Kubernetes 、 NGINX、Docker进行部署集成
在本文中,我们将讨论 Ingress 的基础知识和用例。此外,借助 .NET Core 8 Web API、Docker、Kubernetes 和 Ingress 逐步实现和配置不同的服务。
议程
·什么是 NGINX Ingress?
·NGINX Ingress 的用例
·使用 .NET Core 8 Web API 实现服务
·服务容器化和 NGINX 入口配置。
先决条件
·Visual Studio 2022
· .NET Core 8 SDK
·Docker 和 Kubernetes
什么是 NGINX Ingress?
·简单来说,Nginx Ingress 是一种管理传入 Web 应用程序或服务的互联网流量的方法。把它想象成你的网络服务器的交通警察。它位于应用程序的前面并引导流量,就像 Web 请求的路由器一样。
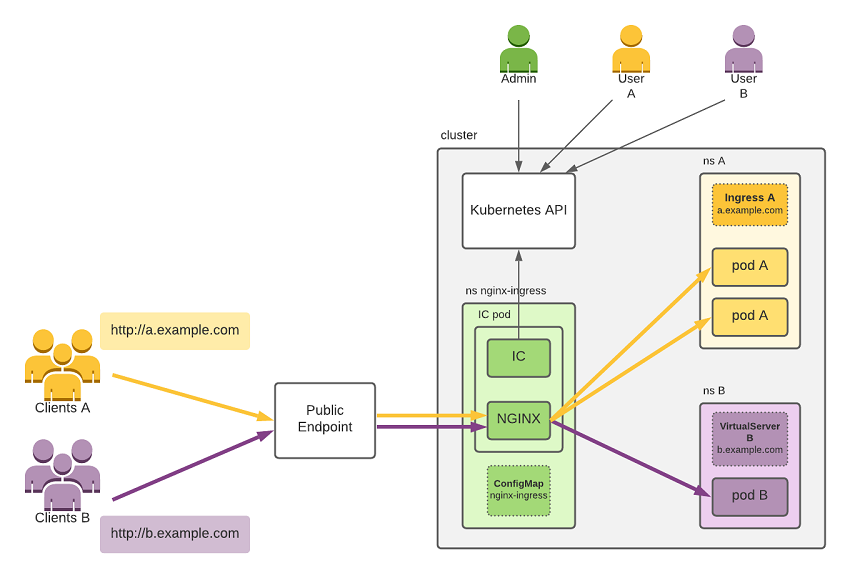
·Nginx Ingress 会检查传入的请求,并根据您定义的规则决定将请求发送到何处。这可能意味着根据请求的 URL 或其他条件将请求定向到不同的服务。它还可以处理负载平衡、SSL 终止(解密 HTTPS 流量)以及与管理传入 Web 流量相关的其他任务。
·总体而言,Nginx Ingress 可帮助您高效地管理 Web 流量并将其路由到您的应用程序,从而提高性能、安全性和可扩展性。
NGINX Ingress 的用例
以下是 Ingress 的一些用例
负载平衡:将传入的 Web 流量均匀分布在多个服务器上,以防止过载并确保更好的性能。
路由:根据 URL 或域名等因素将 Web 请求定向到应用程序的不同部分。
SSL 终止:集中管理 HTTPS 加密和解密,以保护 Web 流量,而不会给单个服务器带来负担。
虚拟主机:在同一台服务器上托管多个网站或应用程序,每个网站或应用程序都有自己的域名。
身份验证和授权:在请求到达服务器之前,根据用户凭据或权限控制对应用程序的访问。
速率限制:限制来自单个客户端或 IP 地址的请求数量,以防止滥用或过度使用服务。
**Web 应用防火墙 (WAF):**根据预定义的安全规则检查和过滤传入流量,保护应用免受常见的 Web 安全威胁。
使用 .NET Core 8 Web API 实现服务
产品服务
步骤1:
创建新的 Product 类。
namespace ProductAPI.Models
{
    public class Product
    {
        public int Id { get; set; }
        public string Name { get; set; }
        public decimal Price { get; set; }
    }
}
步骤2:
添加具有不同终结点的新产品控制器。
using System;
using System.Collections.Generic;
using System.Linq;
using System.Threading.Tasks;
using Microsoft.AspNetCore.Mvc;
using Microsoft.Extensions.Logging;
using ProductAPI.Models;

namespace ProductAPI.Controllers
{
    [ApiController]
    [Route("[controller]")]
    public class ProductsController : ControllerBase
    {
        private static List<Product> _products = new List<Product>
        {
            new Product { Id = 1, Name = "Product 1", Price = 10.99m },
            new Product { Id = 2, Name = "Product 2", Price = 20.49m }
        };

        private readonly ILogger<ProductsController> _logger;

        public ProductsController(ILogger<ProductsController> logger)
        {
            _logger = logger;
        }

        [HttpGet]
        public IEnumerable<Product> Get()
        {
            return _products;
        }

        [HttpGet("{id}")]
        public ActionResult<Product> Get(int id)
        {
            var product = _products.FirstOrDefault(p => p.Id == id);
            if (product == null)
            {
                return NotFound();
            }
            return product;
        }

        [HttpPost]
        public ActionResult<Product> Post(Product product)
        {
            product.Id = _products.Count + 1;
            _products.Add(product);
            return CreatedAtAction(nameof(Get), new { id = product.Id }, product);
        }

        [HttpPut("{id}")]
        public IActionResult Put(int id, Product product)
        {
            var existingProduct = _products.FirstOrDefault(p => p.Id == id);
            if (existingProduct == null)
            {
                return NotFound();
            }
            existingProduct.Name = product.Name;
            existingProduct.Price = product.Price;
            return NoContent();
        }

        [HttpDelete("{id}")]
        public IActionResult Delete(int id)
        {
            var product = _products.FirstOrDefault(p => p.Id == id);
            if (product == null)
            {
                return NotFound();
            }
            _products.Remove(product);
            return NoContent();
        }
    }
}
步骤3:
在程序类中注册服务和中间件。
var builder = WebApplication.CreateBuilder(args);

// Add services to the container.

builder.Services.AddControllers();
// Learn more about configuring Swagger/OpenAPI at https://aka.ms/aspnetcore/swashbuckle
builder.Services.AddEndpointsApiExplorer();
builder.Services.AddSwaggerGen();

var app = builder.Build();

// Configure the HTTP request pipeline.
app.UseSwagger();
app.UseSwaggerUI();


app.UseHttpsRedirection();

app.UseAuthorization();

app.MapControllers();

app.Run();

用户服务
步骤1:
创建新的 User 类。
namespace UserAPI.Models
{
    public class User
    {
        public int Id { get; set; }
        public string Name { get; set; }
        public string Email { get; set; }
    }
}
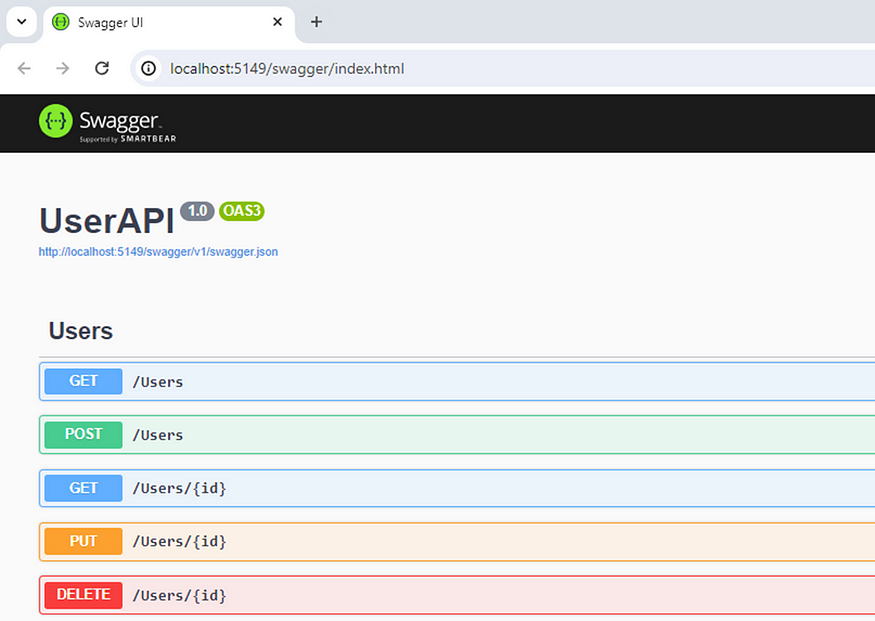
步骤2:
添加具有不同终结点的新用户控制器。
using System;
using System.Collections.Generic;
using System.Linq;
using System.Threading.Tasks;
using Microsoft.AspNetCore.Mvc;
using Microsoft.Extensions.Logging;
using UserAPI.Models;

namespace UserAPI.Controllers
{
    [ApiController]
    [Route("[controller]")]
    public class UsersController : ControllerBase
    {
        private static List<User> _users = new List<User>
        {
            new User { Id = 1, Name = "User 1", Email = "user1@example.com" },
            new User { Id = 2, Name = "User 2", Email = "user2@example.com" }
        };

        private readonly ILogger<UsersController> _logger;

        public UsersController(ILogger<UsersController> logger)
        {
            _logger = logger;
        }

        [HttpGet]
        public IEnumerable<User> Get()
        {
            return _users;
        }

        [HttpGet("{id}")]
        public ActionResult<User> Get(int id)
        {
            var user = _users.FirstOrDefault(u => u.Id == id);
            if (user == null)
            {
                return NotFound();
            }
            return user;
        }

        [HttpPost]
        public ActionResult<User> Post(User user)
        {
            user.Id = _users.Count + 1;
            _users.Add(user);
            return CreatedAtAction(nameof(Get), new { id = user.Id }, user);
        }

        [HttpPut("{id}")]
        public IActionResult Put(int id, User user)
        {
            var existingUser = _users.FirstOrDefault(u => u.Id == id);
            if (existingUser == null)
            {
                return NotFound();
            }
            existingUser.Name = user.Name;
            existingUser.Email = user.Email;
            return NoContent();
        }

        [HttpDelete("{id}")]
        public IActionResult Delete(int id)
        {
            var user = _users.FirstOrDefault(u => u.Id == id);
            if (user == null)
            {
                return NotFound();
            }
            _users.Remove(user);
            return NoContent();
        }
    }
}
步骤3:
在程序类中注册服务和中间件。
var builder = WebApplication.CreateBuilder(args);

// Add services to the container.

builder.Services.AddControllers();
// Learn more about configuring Swagger/OpenAPI at https://aka.ms/aspnetcore/swashbuckle
builder.Services.AddEndpointsApiExplorer();
builder.Services.AddSwaggerGen();

var app = builder.Build();

// Configure the HTTP request pipeline.
app.UseSwagger();
app.UseSwaggerUI();

app.UseHttpsRedirection();

app.UseAuthorization();

app.MapControllers();

app.Run();
业务容器化和 NGINX 入口配置
步骤1:
为产品和用户服务添加 docker 映像。
产品服务
# Use the official .NET Core SDK as a parent image
FROM mcr.microsoft.com/dotnet/sdk:8.0 AS build
WORKDIR /app

# Copy the project file and restore any dependencies (use .csproj for the project name)
COPY *.csproj ./
RUN dotnet restore

# Copy the rest of the application code
COPY . .

# Publish the application
RUN dotnet publish -c Release -o out

# Build the runtime image
FROM mcr.microsoft.com/dotnet/aspnet:8.0 AS runtime
WORKDIR /app
COPY --from=build /app/out ./

# Expose the port your application will run on
EXPOSE 80

# Start the application
ENTRYPOINT ["dotnet", "ProductAPI.dll"]
用户服务
# Use the official .NET Core SDK as a parent image
FROM mcr.microsoft.com/dotnet/sdk:8.0 AS build
WORKDIR /app

# Copy the project file and restore any dependencies (use .csproj for the project name)
COPY *.csproj ./
RUN dotnet restore

# Copy the rest of the application code
COPY . .

# Publish the application
RUN dotnet publish -c Release -o out

# Build the runtime image
FROM mcr.microsoft.com/dotnet/aspnet:8.0 AS runtime
WORKDIR /app
COPY --from=build /app/out ./

# Expose the port your application will run on
EXPOSE 80

# Start the application
ENTRYPOINT ["dotnet", "UserAPI.dll"]
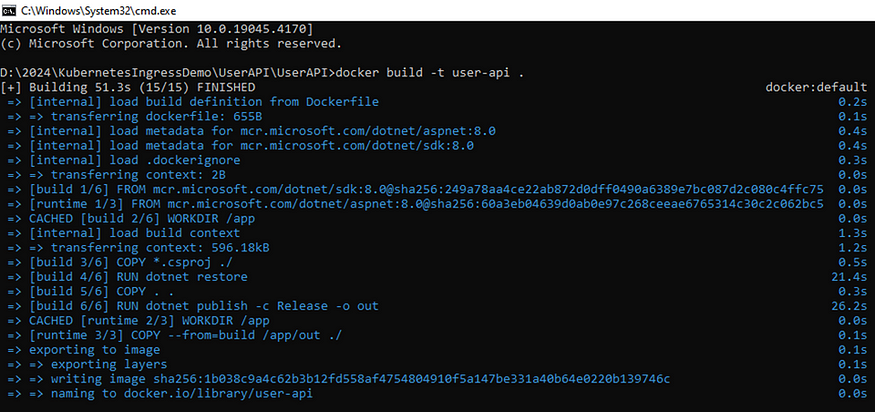
步骤2:
构建 Docker 镜像。
docker build -t product-api 中。
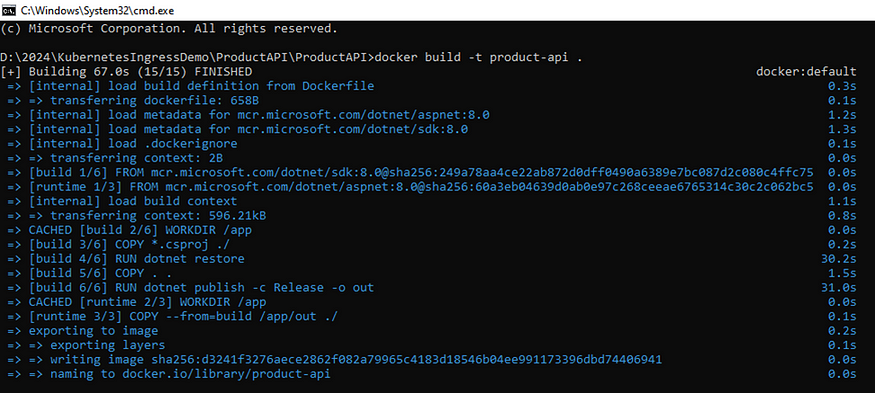
docker build -t user-api 中。
步骤3:
为 Kubernetes 创建部署、服务和入口 YAML 文件。
部署
apiVersion: apps/v1
kind: Deployment
metadata:
  name: product-app-deployment  # Name of the deployment
spec:
  selector:
    matchLabels:
      app: product-app  # Label selector to match pods controlled by this deployment
  template:
    metadata:
      labels:
        app: product-app  # Labels applied to pods created by this deployment
    spec:
      containers:
        - name: product-app  # Name of the container
          image: product-api:latest  # Docker image to use
          imagePullPolicy: Never
          ports:
          - containerPort: 80  # Port to expose within the pod
apiVersion: apps/v1
kind: Deployment
metadata:
  name: user-app-deployment  # Name of the deployment
spec:
  selector:
    matchLabels:
      app: user-app  # Label selector to match pods controlled by this deployment
  template:
    metadata:
      labels:
        app: user-app  # Labels applied to pods created by this deployment
    spec:
      containers:
        - name: user-app  # Name of the container
          image: user-api:latest  # Docker image to use
          imagePullPolicy: Never
          ports:
          - containerPort: 80  # Port to expose within the pod
服务业
apiVersion: v1
kind: Service
metadata:
  name: product-app-service  # Name of the service
spec:
  selector:
    app: product-app  # Label selector to target pods with this label
  ports:
    - protocol: TCP
      port: 8081
      targetPort: 8080
  type: NodePort  # Type of service (other options include ClusterIP, LoadBalancer, etc.)
apiVersion: v1
kind: Service
metadata:
  name: user-app-service  # Name of the service
spec:
  selector:
    app: user-app  # Label selector to target pods with this label
  ports:
    - protocol: TCP
      port: 8082
      targetPort: 8080
  type: NodePort  # Type of service (other options include ClusterIP, LoadBalancer, etc.)
入口
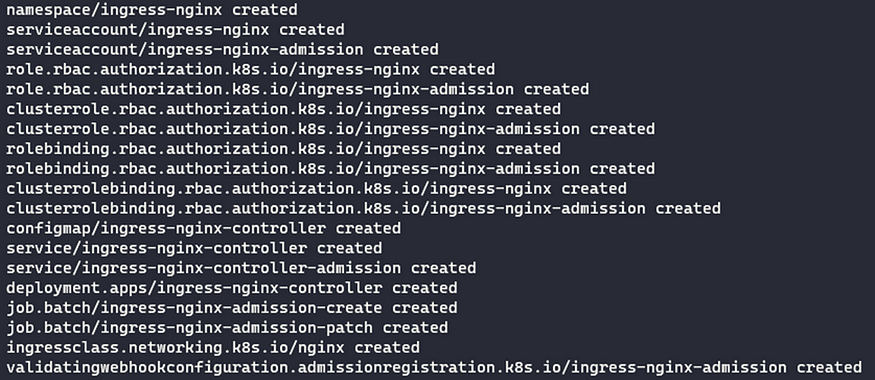
首先,您需要在 Kubernetes 集群上安装 Ingress。
kubectl apply -f https://raw.githubusercontent.com/kubernetes/ingress-nginx/main/deploy/static/provider/cloud/deploy.yaml
apiVersion: networking.k8s.io/v1
kind: Ingress
metadata:
  name: demo-ingress
spec:
  ingressClassName: nginx
  rules:
  - host: ingress.demo.com
    https:
      paths:
      - path: /products
        pathType: Prefix
        backend:
          service:
            name: product-app-service
            port:
              number: 8081
      - path: /users
        pathType: Prefix
        backend:
          service:
            name: user-app-service
            port:
              number: 8082
接下来,创建一个具有不同规则的入口文件
此 YAML 文件设置规则,用于将流向特定域 (ingress.demo.com) 的 Web 流量定向到 Kubernetes 集群中的不同服务。
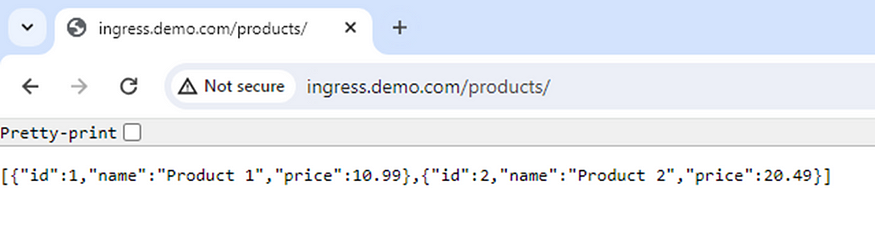
·当有人转到 ingress.demo.com/products 时,他们的请求会转到在端口 8081 上运行的名为 product-app-service 的服务。
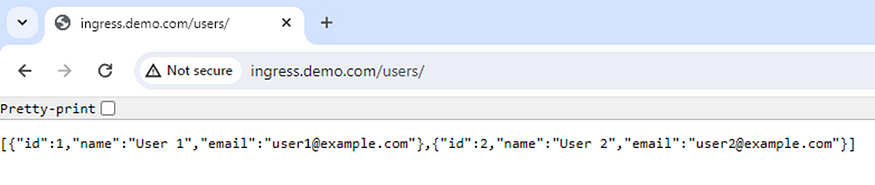
·当有人访问 ingress.demo.com/users 时,他们的请求会转到在端口 8082 上运行的名为 user-app-service 的服务。
此配置由 Ingress 资源使用 NGINX Ingress 控制器进行管理。这是一种在 Kubernetes 中管理对服务的外部访问的方法。
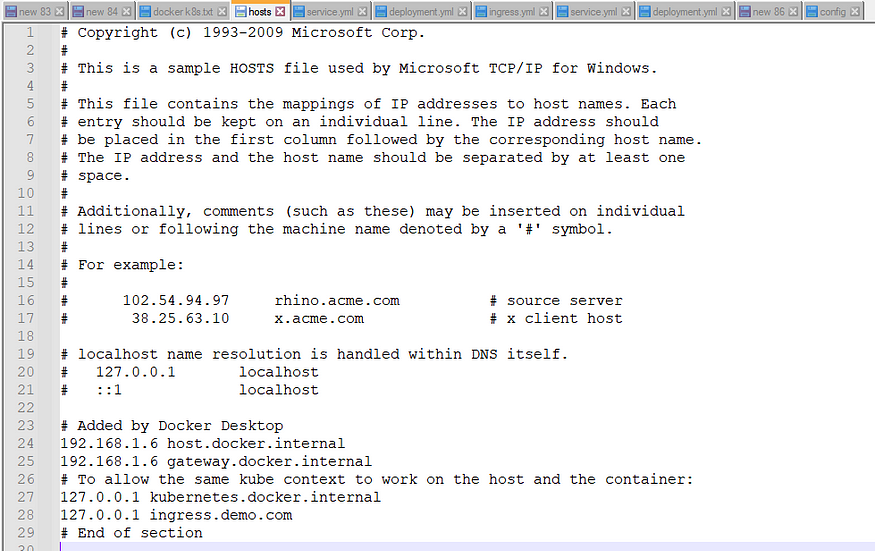
步骤4:
在位于 /etc/host 下的主机文件中使用 IP 配置 Ingress 主机
注意:每个提供程序的主机文件路径都不同。在这里,我将 Kubernetes 与 Docker Desktop 一起使用。因此,文件路径为 C:\Windows\System32\drivers\etc
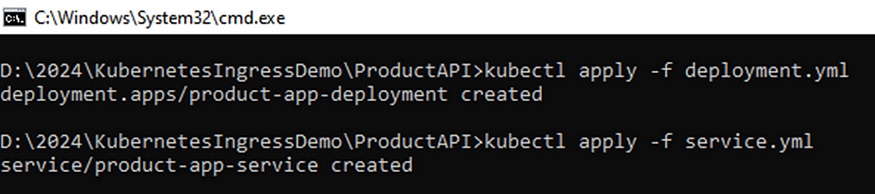
步骤5:
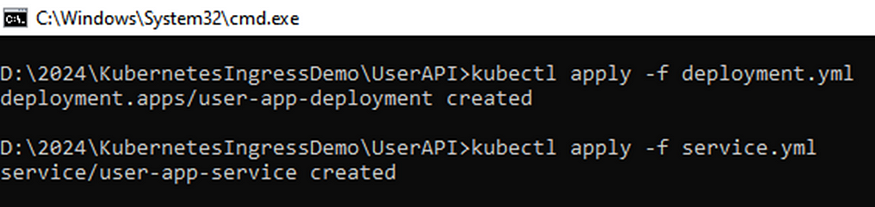
将 YAML 文件应用于 Kubernetes 集群。

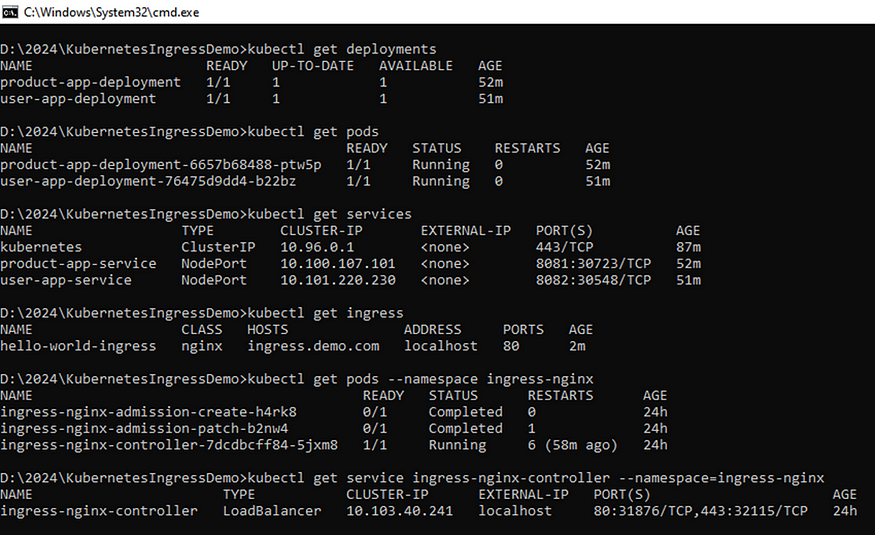
步骤6:
您可以在入口主机的帮助下访问不同的终端节点,并且根据请求 URL,入口会将您的请求传递到特定服务。
在本文中,我们学习了 ingress 的基础知识及其用例。此外,在 Docker 和 Kubernetes 的帮助下逐步实现服务和容器化。此外,使用 Kubernetes 集群进行入口安装和配置。
源代码获取:公众号回复消息【code:43671】

 code:43671 获取下载地址