在 .Net Core 中实现长时间运行的后台服务
.NET 中的后台服务是在应用程序后台运行的服务,在不中断主执行流的情况下处理各种任务。以下是后台服务有益的一些情况:
后台服务的用例
- 实时通知:根据特定事件(例如网站维护或用户操作)向用户发送通知。
- 批量作业:例如,贷款服务可能需要每天查询用户数据、验证贷款支付状态、计算到期金额并更新用户的帐户。
- 定时作业:每隔几分钟对应用程序执行一次定期运行状况检查,以确保数据库和外部依赖项正常运行,或者每 4 到 6 小时清除一次应用程序缓存。
- 高级用例:数据流处理、文件处理和实时数据监控。
实现后台服务
IHostedService 接口
.NET Framework 提供用于实现后台服务的 IHostedService 接口。此接口适用于短期运行的任务。使用 IHostedService 时,实现 StartAsync 方法对于启动服务至关重要。但是,StartAsync 中长时间运行的任务可能会延迟应用程序启动,因为它会阻止其他服务启动直到完成。
BackgroundService 类
对于长时间运行的任务,BackgroundService 抽象类更合适。它允许长时间运行的操作执行,而不会阻塞应用程序的主执行流程。
创建长时间运行的后台服务的步骤
- 创建一个继承 BackgroundService 的类:实现 BackgroundService 抽象类。
public class EmailProcessingBackgroundService : BackgroundService
2. 注册后台服务:将服务注册为托管服务并启动它。
对于 .Net 控制台应用程序:
//use the HostBuilder class to build a host and register our background service
var host = new HostBuilder()
    .ConfigureServices(services => services.AddHostedService<EmailProcessingBackgroundService>()).Build();

// start the host
await host.StartAsync();
对于 .Net Web 应用程序
//Add Hosted service to the web application builder
builder.Services.AddHostedService<EmailProcessingBackgroundService>();
示例:电子邮件通知服务
问题陈述
在用户下订单时通过电子邮件通知用户。
工作流程
- 用户下订单。
- 检索订单详细信息和用户的电子邮件。
- 将信息发送到队列。
- 后台服务监视队列中的新数据。
- 检测到新数据后,后台服务会向客户发送电子邮件。
- 从队列中删除已处理的数据。
工具和软件包
- .NET 控制台应用程序
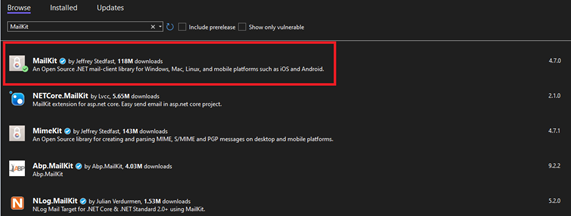
- MailKit NuGet 包(用于发送电子邮件)
- Microsoft.Extensions.Hosting NuGet 包(用于配置主机)
实现示例的步骤
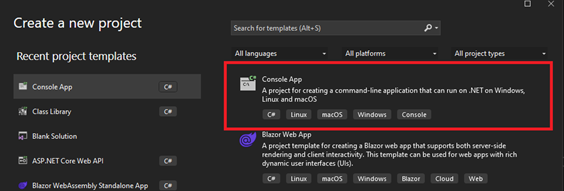
- 创建 .NET 控制台应用程序
2. 配置 MailKit:安装 MailKit NuGet 包。
3. 添加模型和服务:
- 创建一个 Email 类来表示电子邮件对象。
public class Email
{
    public EmailAddress Reciever { get;  set; }
    public string Subject { get; set; }
    public string Body { get; set; }

    public override string ToString()
    {
        return JsonSerializer.Serialize(this);
    }
}
- 创建一个 FakeQueue 类。我们将使用此类来复制消息传递队列行为。我们希望我们的后台服务从此队列中获取电子邮件并处理它们
public static class FakeQueue
{

    private static readonly Queue<Email> _emails = new();

    public static Queue<Email> Emails => _emails;

    public static void Add(Email email)
    {
        _emails.Enqueue(email);
    }

    public static void Dequeue()
    {
        _emails.Dequeue();
- 使用 MailKit 包实现电子邮件服务。
using MailKit.Net.Smtp;
using MimeKit;

namespace BackgroundServiceDemo.Services
{
    public class MailKitSmtpEmailService : IEmailService
    {
        private readonly EmailServerConfiguration _emailServerConfiguration;

        public MailKitSmtpEmailService(EmailServerConfiguration emailServerConfiguration)
        {
            _emailServerConfiguration = emailServerConfiguration;
        }

        public async Task SendAsync(Email email)
        {
            using var client = new SmtpClient();
            await client.ConnectAsync(host: _emailServerConfiguration.Host,
                port: _emailServerConfiguration.Port,
                options: MailKit.Security.SecureSocketOptions.StartTls);
            await client.AuthenticateAsync(_emailServerConfiguration.Username, _emailServerConfiguration.Password);
            await client.SendAsync(CreateEmail(email));
            await client.DisconnectAsync(true);
            client.Dispose();

        }

        private MimeMessage CreateEmail(Email email)
        {
            var message = new MimeMessage()
            {
                Subject = email.Subject,
                Body = new TextPart(MimeKit.Text.TextFormat.Text)
                {
                    Text = email.Body
                }
            };
            message.From.Add(new MailboxAddress("Test", _emailServerConfiguration.From));
            message.To.Add(new MailboxAddress("Reciever", email.Reciever.Value));
            return message;

        }
    }
}
.实施订单服务来下订单
首先,我们创建 IOrderService 接口
public interface IOrderService
{
    public void PlaceOrder(Email email);
}
接下来,我们创建 OrderService 类
public class OrderService : IOrderService
{
    public void PlaceOrder(Email email)
    {
        Console.WriteLine("Your order has been placed Successfully. Check your email");
        email.Body = "Order Placed: Thank you for patronizing us";
        FakeQueue.Add(email);
    }
}
4. 创建后台服务:
using Microsoft.Extensions.Hosting;

namespace BackgroundServiceDemo.Services
{
    public class EmailProcessingBackgroundService : BackgroundService
    {
        private readonly IEmailService mailKitEmailService;

        public EmailProcessingBackgroundService()
        {
            mailKitEmailService =  new MailKitSmtpEmailService(AppConfigurationProvider.GetEmailConfiguration());

        }

        protected override async Task ExecuteAsync(CancellationToken stoppingToken)
        {
            while (!stoppingToken.IsCancellationRequested)
            {
                await ProccessEmailsAsync();
                await Task.Delay(TimeSpan.FromMinutes(1), stoppingToken);
            }
        }


        private async Task ProccessEmailsAsync()
        {
            await Task.Run(async () =>{
                if (FakeQueue.Emails.Count() > 0)
                {
                    foreach(var email in FakeQueue.Emails)
                    {
                        await Console.Out.WriteLineAsync($"Proccessing: {email.ToString()}\\n");
                        await mailKitEmailService.SendAsync(email);
                        FakeQueue.Dequeue();

                    }

                }
            });

        }
    }
}
我们创建了一个后台服务,该服务每分钟持续检查队列中的新电子邮件,并将电子邮件发送到收件人的地址。
重要提示:当后台服务运行时,它最初是一个阻塞操作。只有在执行第一个异步操作后,它才开始在后台运行。如果在 ExecuteAsync 方法中执行的操作是同步的,它将阻止调用线程,并且在 ExecuteAsync 方法完成其所有操作之前,应用程序的其余部分不会运行
5. 安装 Microsoft.Extensions.Hosting 包

6. 在 Program.cs 中注册后台服务:
// See https://aka.ms/new-console-template for more information
using BackgroundServiceDemo.Services;
using BackgroundServiceDemo.Models;
using System.Diagnostics;
using Microsoft.Extensions.Hosting;
using Microsoft.Extensions.DependencyInjection;


Console.WriteLine("Application Started");

//Get Email Configuration
var emailServerConfiguration = AppConfigurationProvider.GetEmailConfiguration();

//Add Hosted Service
var host = new HostBuilder()
    .ConfigureServices(services => services.AddHostedService\<EmailProcessingBackgroundService>()).Build();
await host.StartAsync();

try
{
    while(true)
    {
        Stopwatch stopwatch = Stopwatch.StartNew();
        //Instantiate email
        Email email = new()
        {
            Subject = "Test From Background Service",
        };

        //Get Info from User
        do
        {
            Console.WriteLine("Type in your email address to place your order");
            email.Reciever = new EmailAddress(Console.ReadLine());

            if (!email.Reciever.IsValid)
            {
                Console.WriteLine("Invalid email address");
            }
        }
        while(!email.Reciever.IsValid);

        // Instantiate order service and place order
        IOrderService orderService = new OrderService();
        orderService.PlaceOrder(email);

        stopwatch.Stop();
        Console.WriteLine($"Logic completed in {stopwatch.Elapsed}");
    }
}
catch (Exception ex)
{
    Console.WriteLine("An exception occured in your application");
    Console.WriteLine("Message: {0}", ex.Message);

}
- 首先,我们实例化 HostBuilder 类,该类配置和构建主机。
- 接下来,我们使用 ConfigureServices 方法注册后台服务。
- 最后,我们启动主机。这将遍历已注册的托管服务列表,并按顺序在每个托管服务上执行 StartAsync 方法。在这种情况下,我们只注册了一个服务,因此只启动了一个托管服务。
输出

后台服务对于在不阻止应用程序主执行的情况下处理操作很有价值。虽然有些人可能更喜欢将 CRON 作业或微服务与 Azure 服务总线等消息传递服务结合使用,但分析并选择最适合特定需求的方法至关重要。
源代码获取:公众号回复消息【code:62932】

 code:62932 获取下载地址