如何使用 Python 语言和 Laravel 框架创建自己的搜索引擎 - 第 2 步(共 4 步)
第 2 步:使用 Python Scrapy 进行数据爬取
在这部分中,我将编写一个网络爬虫,它将从书籍中抓取数据到抓取网站。但在我进入代码之前,这里有一个关于Scrapy本身的简要介绍。
什么是Scrapy?
来自维基百科:
Scrapy(发音为 skray-pee)是一个免费的开源网络爬虫框架,用 Python 编写。它最初是为网络抓取而设计的,也可用于使用 API 提取数据或作为通用网络爬虫。它目前由网络抓取开发和服务公司 Scrapinghub Ltd. 维护。
先决条件
因此,就像上一部分要遵循的本部分教程一样,您应该具有:
- python 3.x.x
- 包管理器 PIP
- 代码编辑器(在本教程中,我将使用 Visual Studio Code,可选)
安装 Scrapy
现在,在我们开始我们的第一个 Scrapy 项目之前,我们需要安装 Scrapy,因此请打开您的终端并输入:
pip install scrapy
开始你的第一个项目
在您的终端中输入:
scrapy startproject <project_name>
其中 <project_name> 是项目名称,您可以随意称呼它。但在本教程中,我将使用“web_scrap”
Scrapy 项目结构
在我们进行刮擦过程之前,最好我们知道刮擦项目的结构
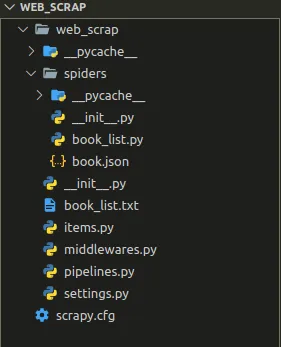
Scrapy项目的结构
从_StartProject命令运行后可以看出,Scrapy将自动创建项目。但是在新创建的项目中,您将看不到文件“book_list.py”,因为它是手动创建的用于抓取的文件。而“book.json_**”**是刮擦过程的结果。
制作 Scrapy 脚本
与上一个项目的结构一样,我们将在**“**_Spiders”_目录中为scrapy创建一个脚本。在本教程中,我创建了一个名为“book_list.py”的粗糙脚本。如果您有 VS Code,只需输入:
code <project_name>/spiders/book_list.py
并用这个脚本填充你的空白脚本:
book_list.py
import scrapy
import json

filename = "book.json"  # To save store data

class IntroSpider(scrapy.Spider):
    name = "book_spider"     # Name of the scraper

    def start_requests(self):
        urls = [
            'https://books.toscrape.com/catalogue/page-{x}.html'.format(x=x) for x in range(1, 50)   # x denotes page number
        ]

        for url in urls:
            yield scrapy.Request(url=url, callback=self.parse)

    def parse(self, response):
        list_data=[]

        book_list = response.css('article.product_pod > h3 > a::attr(title)').extract()  # accessing the titles
        link_list = response.css('article.product_pod > h3 > a::attr(href)').extract()  # accessing the titles
        price_list = response.css('article.product_pod > div.product_price > p.price_color::text').extract()
        image_link = response.css('article.product_pod > div.image_container > a > img::attr(src)').extract()  # accessing the titles

        i=0;
        for book_title in book_list:
            data={
                'book_title' : book_title,
                'price' : price_list[i],
                'image-url' : image_link[i],
                'url' : link_list[i]
            }
            i+=1
            list_data.append(data)

        with open(filename, 'a+') as f:   # Writing data in the file
            for data in list_data :
                app_json = json.dumps(data)
                f.write(app_json+"\n")
介绍剧本
import scrapy
import jsonfilename = "book.json"  # To save store data
在这一行中,代码是声明废品和确定输出文件的地方。在本教程中,我将输出文件导出为JSON格式文件。
_class_ IntroSpider(_scrapy_._Spider_):
    name = "book_spider"     # Name of the scraper
“name”属性描述了要创建的蜘蛛废料的名称。您可以改用其他名称。name class 属性,基本上我们用来从命令行调用或启动蜘蛛,请记住,在 Scrapy 中,每个蜘蛛都应该有一个唯一的名称。
urls = ['https://books.toscrape.com/catalogue/page-{x}.html'.format(x=x) for x in range(1, 50) ]
urls列表,我们用它来指定我们想要抓取的网站/页面。
另一个是 parse 方法负责解析 DOM,它是我们编写 CSS Selector 表达式来提取数据的地方。
book_list = response.css('article.product_pod > h3 > a::attr(title)').extract()  # accessing the titles
link_list = response.css('article.product_pod > h3 > a::attr(href)').extract()  # accessing the title links
price_list = response.css('article.product_pod > div.product_price > p.price_color::text').extract() # accessing the price
image_link = response.css('article.product_pod > div.image_container > a > img::attr(src)').extract()  # accessing the image links
要获取您需要的CSS选择器,您可以访问该网站并执行此操作。
- 打开一个网站
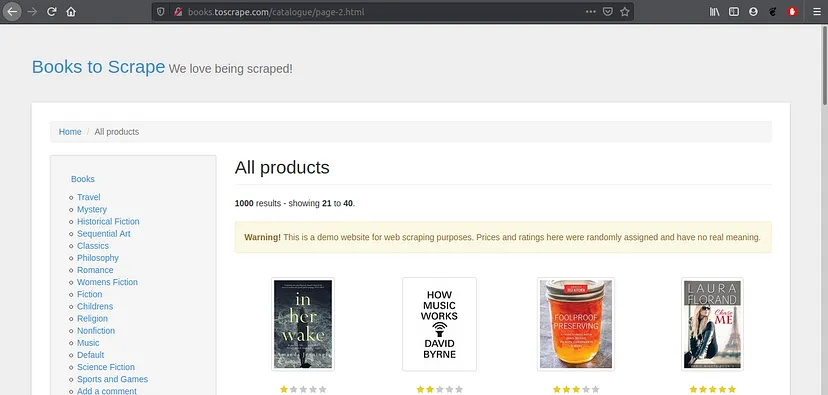
- 在键盘上按“CTRL+Shift+i”,或者您可以右键单击鼠标并在浏览器上选择“检查元素”
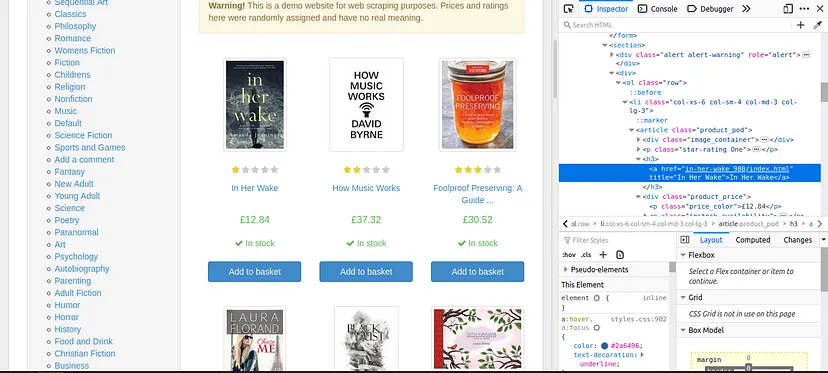
- 最后,右键单击要抓取并复制CSS Selector的行代码。然后你得到CSS选择器路径,或者你可以直接复制CSS路径并自己修改为CSS选择器
最后一件事,我们想用以下代码将我们想要的输出写入JSON文件:
i=0;
for book_title in book_list:
  data={
       'book_title' : book_title,
       'price' : price_list[i],
       'image-url' : image_link[i],
       'url' : link_list[i]
   }
  i+=1
  list_data.append(data)
with open(filename, 'a+') as f:   # Writing data in the file
   for data in list_data :
   app_json = json.dumps(data)
   f.write(app_json+"\n")
此行代码的 JSON 格式的结果是:
{ "book_title": "the title", "price": "the price", "image-url": "the image url", "url" : "the title url" }
执行 Scrapy
在执行你的scrapy之前,你必须在项目目录中,所以从命令行或你的终端导航到你的项目文件夹
cd <project_name>
现在,从命令行中,您可以使用以下命令启动爬虫
scrapy crawl <spider_name>
<spider_name>是之前“name”属性中的名称,因此在我的情况下,我将运行:
scrapy crawl book_spider
输出
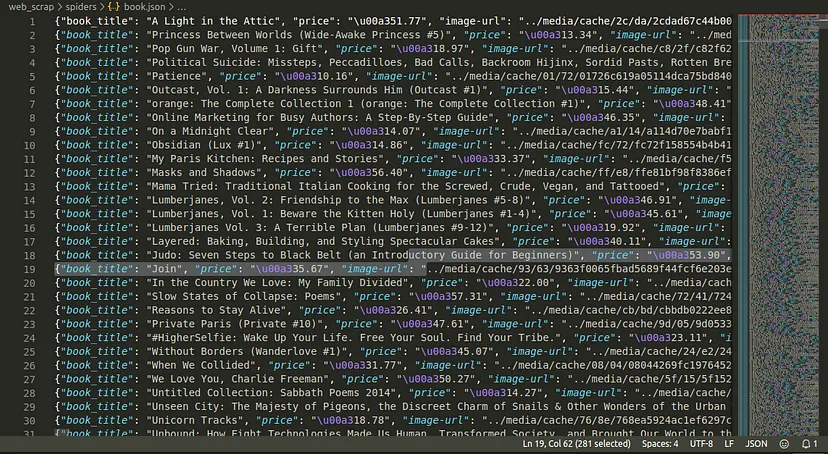
book.json
如果成功,您将获得输出结果名称“book.json”,其中包含我们创建搜索引擎所需的数据集
继续下一部分!
我希望您发现本教程的第二部分有所帮助。我们热衷于使用 Python Scrapy 收集数据集
在下一部分中,我们将使用 Python 编程语言制作索引器和查询脚本
源代码获取:公众号回复消息【code:46958】

 code:46958 获取下载地址